
Welcome to Storyline Tips & Tricks! If you are ever feeling lost when it comes to using Storyline, we are here to help you find ways to get content to your learners quickly and easily. Using the built-in Storyline menu can save you a lot of time and ensure that your navigation functions smoothly.
Today we’re going to look more closely at how the navigation works and how to customize it to fit your needs. You can access the different navigation options via the Player button in the main toolbar, as shown here:

Classic Versus Modern
In Storyline 360, you have access to both the original player (Classic player), and an updated version optimized for mobile and desktop (Modern player). The Classic player gives you more flexibility to customize the colors of the background and player buttons and will be compatible with older courses. The Modern version comes in only dark and light themes. This puts the focus on the material itself and keeps the navigation simplified yet intuitive. Both versions resize properly when viewed on mobile devices, but the Classic player will look different from desktop to mobile. The Modern player’s appearance remains consistent across any device.
Classically Trained
If you go with the Classic player, you can customize the colors of the background and buttons under the Colors & Effects button at the top of the Player options. Click the “Show advanced color editing” text to select colors for each feature, as demonstrated in the following screenshot:
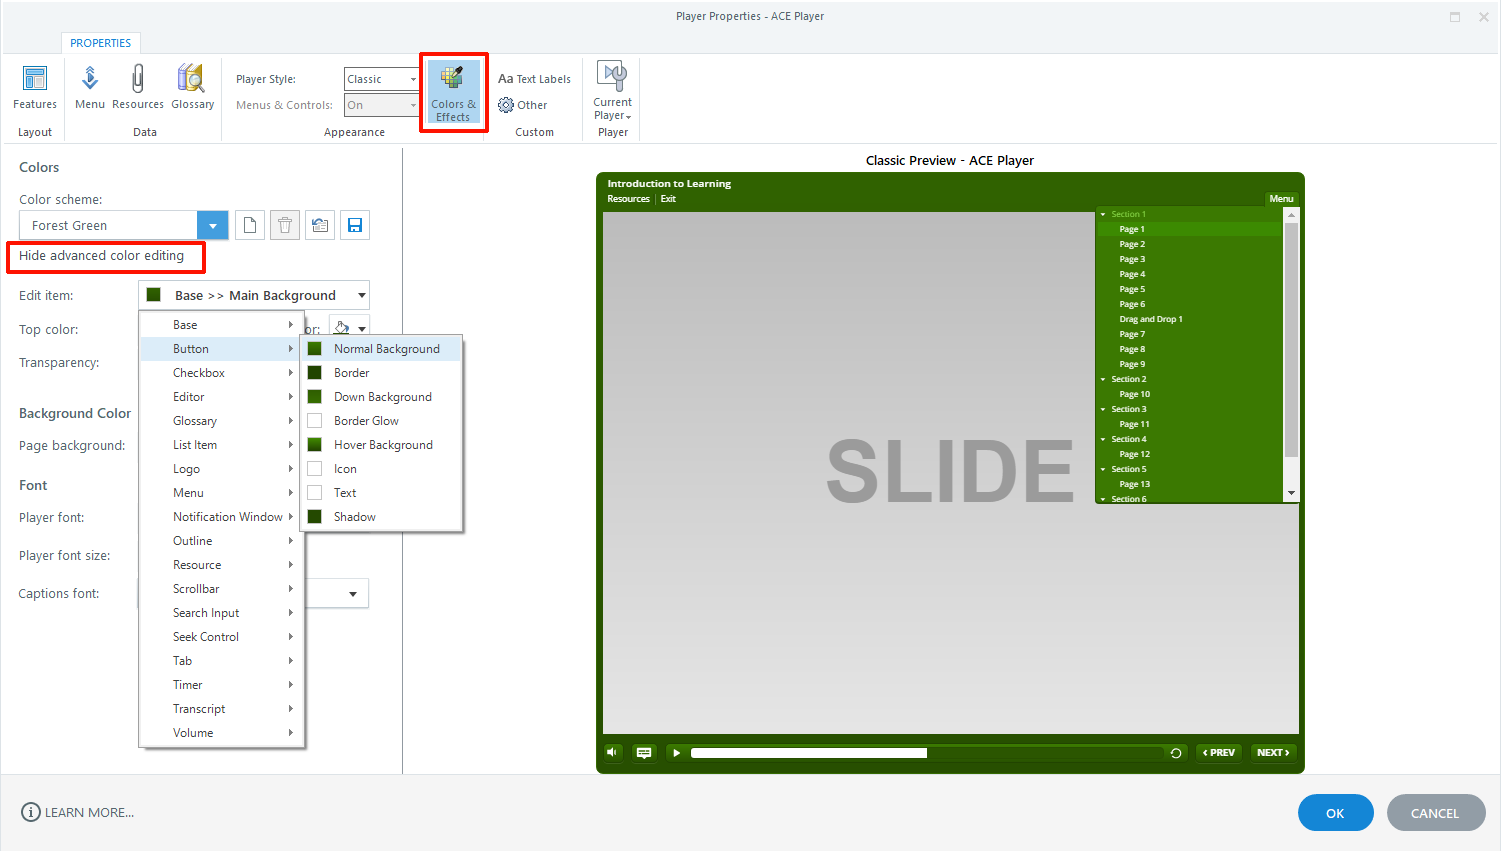
If you get lost trying to figure out what name applies to each particular option, then you can use this handy chart to help determine exactly what piece to customize.
Modern Times
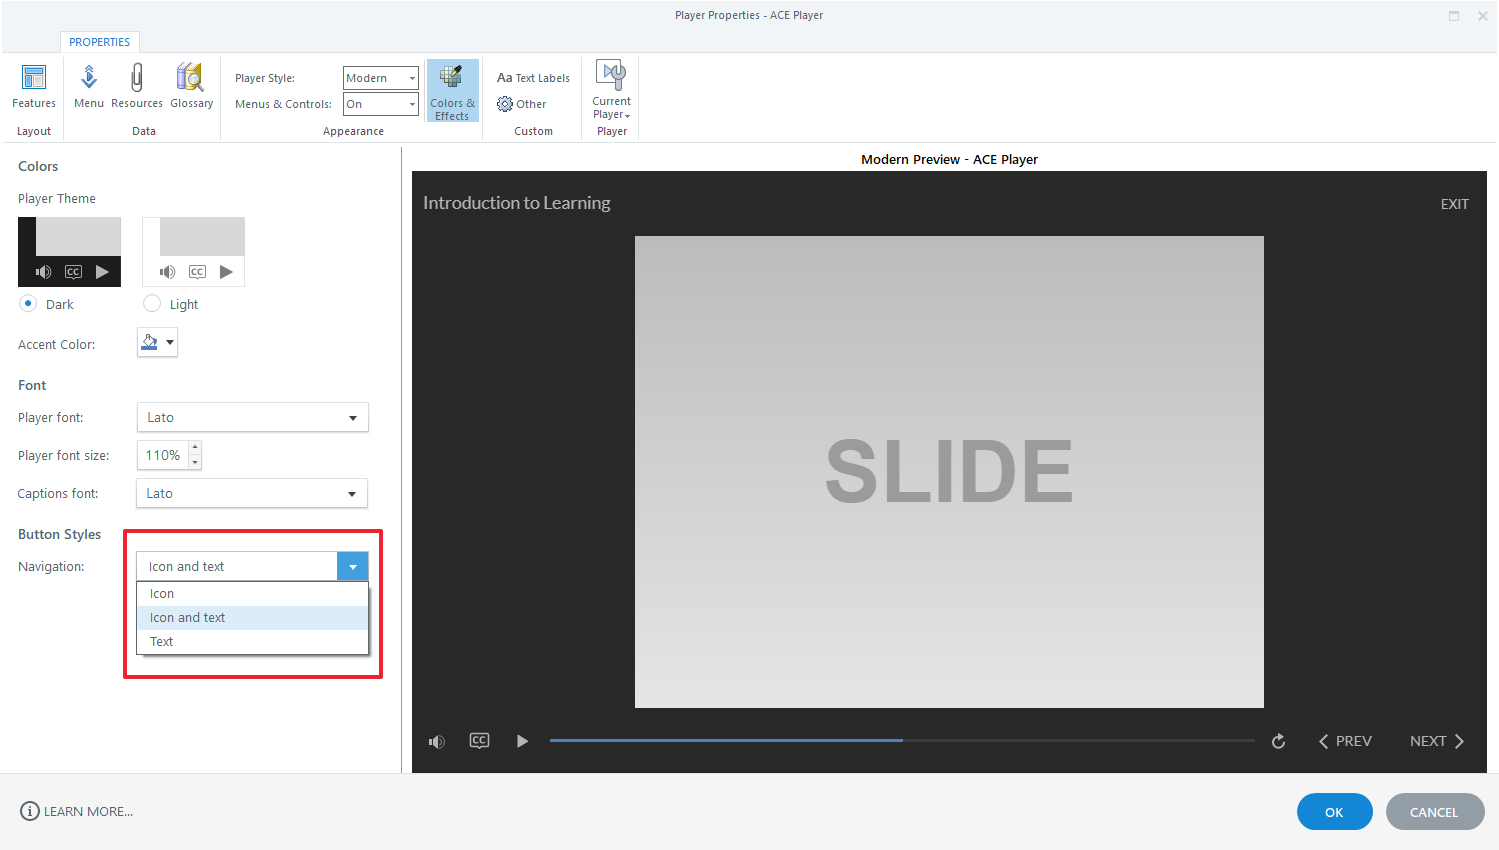
With the Modern player, you have less to worry about as far as colors go, but there is one option that you may want to adjust. By default, the next and previous buttons display as plain arrows. However, if you go to the Colors & Effects section, you will find the option to customize the Button Styles in the Modern player. From here you can add text to the arrow icons, or choose to use text alone:
Button Creation
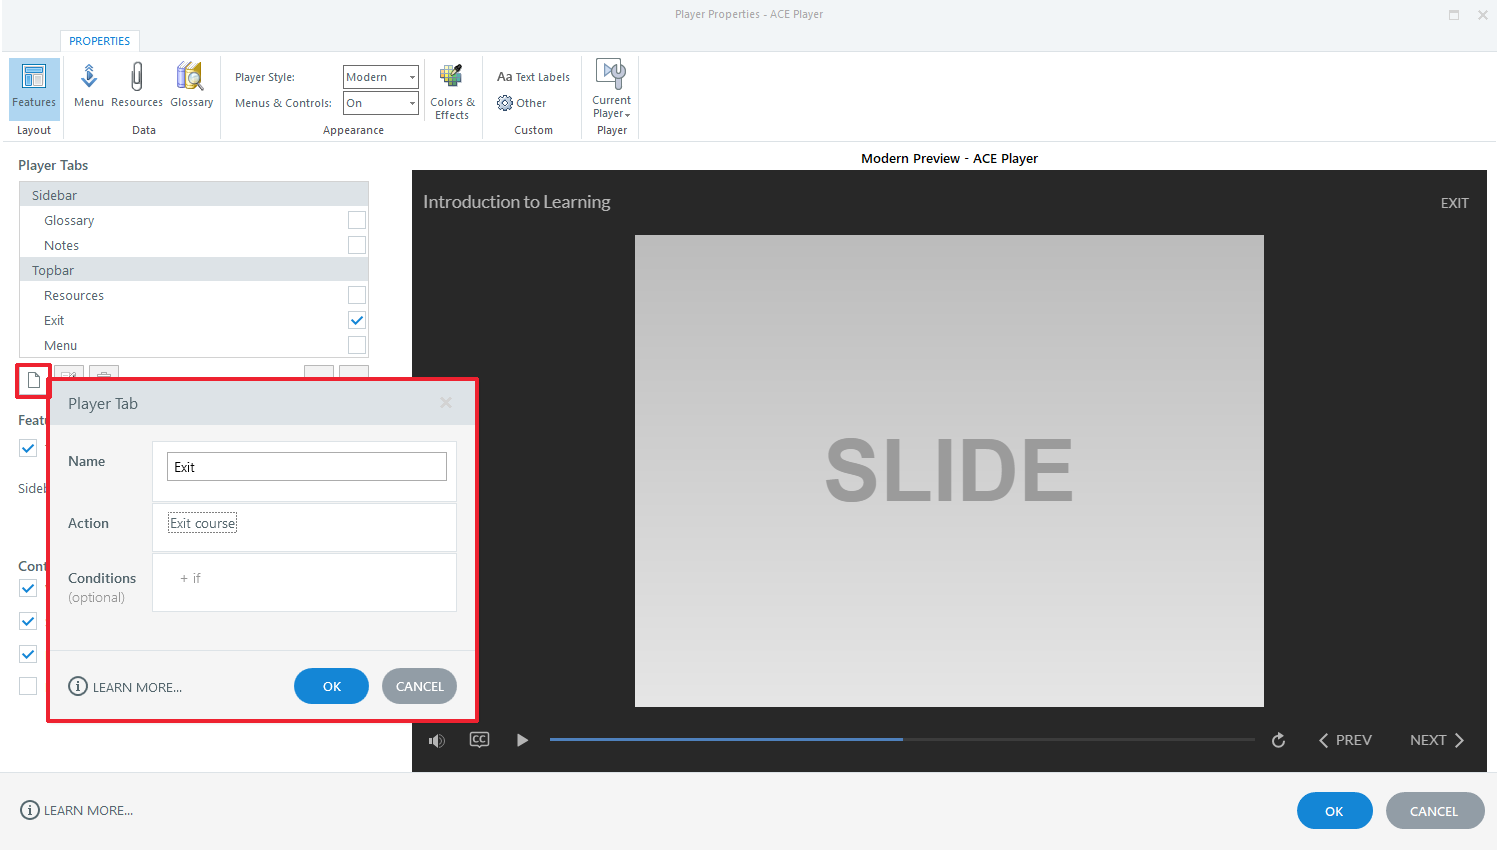
For both Classic and Modern, you can customize which buttons appear on your player, as well as create new buttons. One button you will probably want to add is an Exit button. To do so, select the Add button underneath Features > Player Tabs. It will open a new Player Tab menu where you can type in the name of your new button and direct what action it takes. To create an Exit button, give it the name “Exit” and the Action to “Exit course” as shown in this example screenshot:
Menu Customization
You can also customize the functionality of your Menu navigation. By default, the menu is restricted so that learners cannot use it to skip between pages without first viewing them, and the Next and Previous buttons do not activate until the end of each slide. You can adjust this via the Menu button at the top of the Player properties. The gear symbol at the bottom of the Menu tab contains a dropdown to set the Menu to Free, Restricted or Locked:
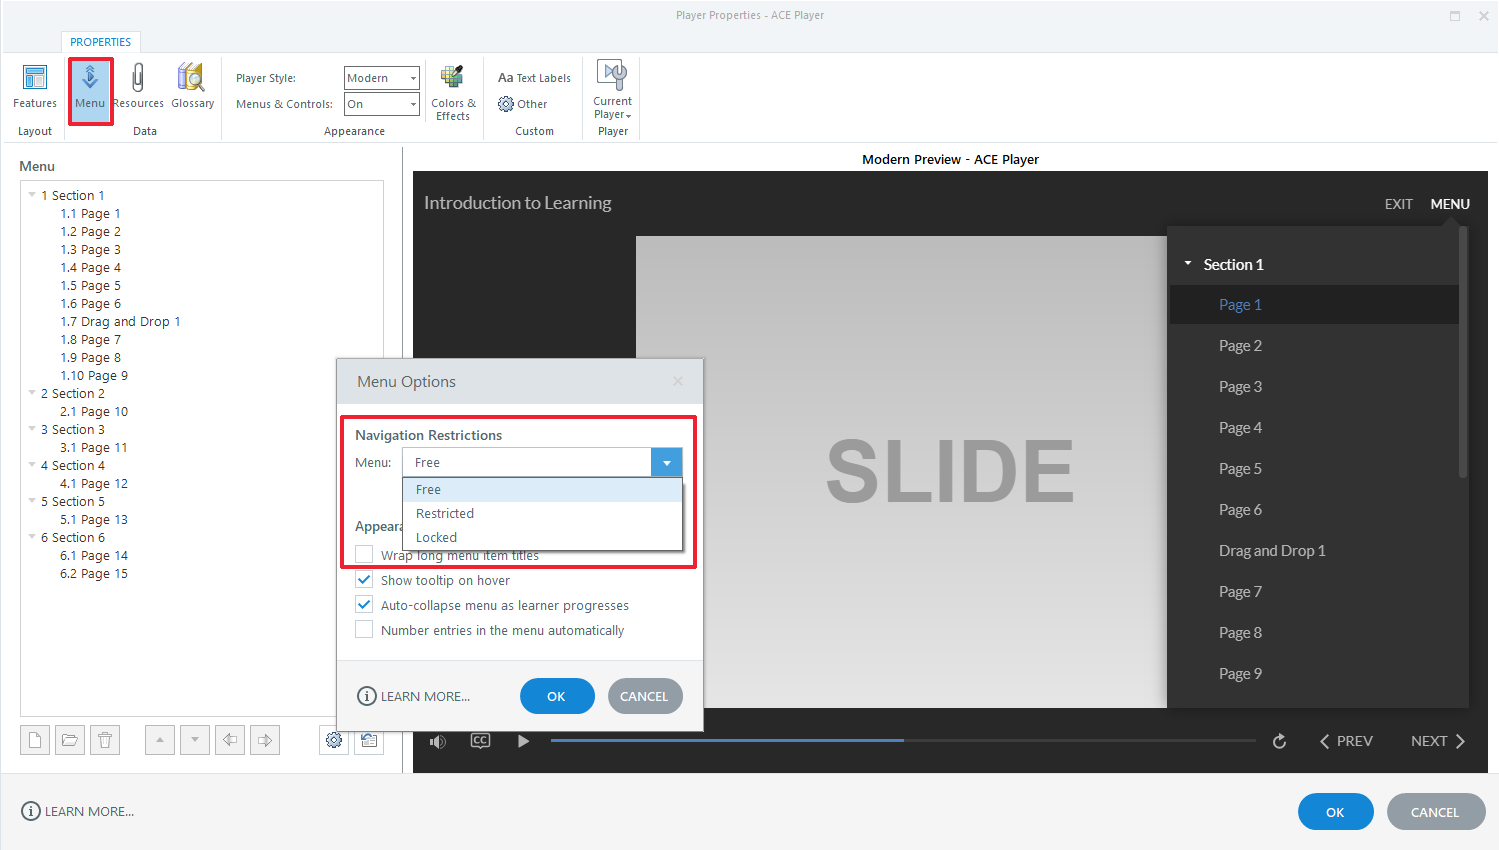
- Free allows the user skip around to any slide at any time.
- Restricted locks future slides until previous slides have been viewed.
- Locked requires the user to view each slide in order, but doesn’t allow them to go back and review slides once they have been viewed.
Note that, next to the gear symbol that contains the menu options, there is a folder symbol that will let you reset your menu to include all the pages in your project. This can be useful if you previously deleted slides from the menu or added in new ones and need to update the order.
You can change the location of any of the Player Tabs in your course, including the Menu, from the top of the navigation to a sidebar by using the arrows shown here to move them where you want them. If the Menu is in the topbar position it will collapse when not in use. If the Menu is on the sidebar it will always be visible.

At Your Fingertips
Last but not least, if you want to include the option to view or download documents in your course, you can use the Resources tab. To add information to the tab, click on the Resources button at the top of the Player properties and upload your documents. Use the Add button in the bottom corner to add a new resource to the list, then give it a title and either a URL for web access or a filename to be included in your published output.

Don’t forget to enable the Resources button in the Player Tabs list or else your learners won’t be able to access your information!
Now you can give your learners the ability to access course resources on the go. Speaking of on the go, that’s all the time we have for this edition of Storyline Tips & Tricks. Feel free to reach out if you are feeling lost – we are happy to help you navigate or to navigate for you if needed!
Looking for more Storyline Tips & Tricks? Check out the rest of the series!
