
One of the greatest things about Storyline is the freedom to create variables and triggers. These offer a level of customization and interactivity limited only by your imagination. There are so many different ways to use variables that we could write pages upon pages about them. However, to keep this article concise, we will stick to an example that you can take and apply to many different situations: showing a checkmark to indicate that a learner has completed a section.
Know Your Variables
Storyline variables fall into three main categories: Text, Number, and True/False. Text and Number variables are self-explanatory – a Text variable could a hold a learner’s name, for example, while a Number variable could keep track of how many times an object is clicked.
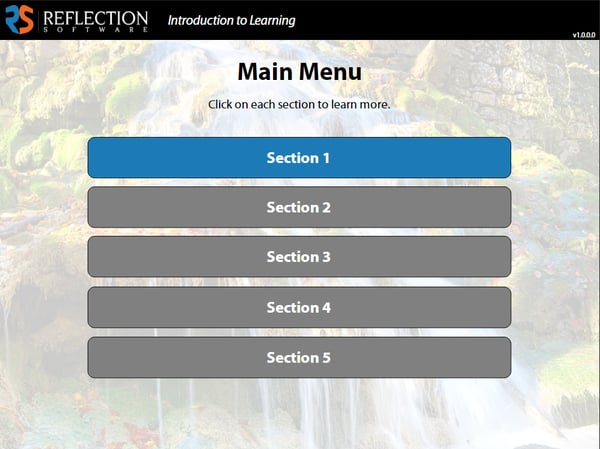
The True/False variable only has two states – it’s either True or False, on or off. Yet this seemingly simple variable allows you to do so much more! Take a look at our sample menu:
Setting the Stage
In order to show the learner what they’ve completed, first we must actually know what they’ve completed. While Storyline automatically keeps track of which slides have been viewed for tracking to the LMS, this information isn’t easily accessible to the developer.
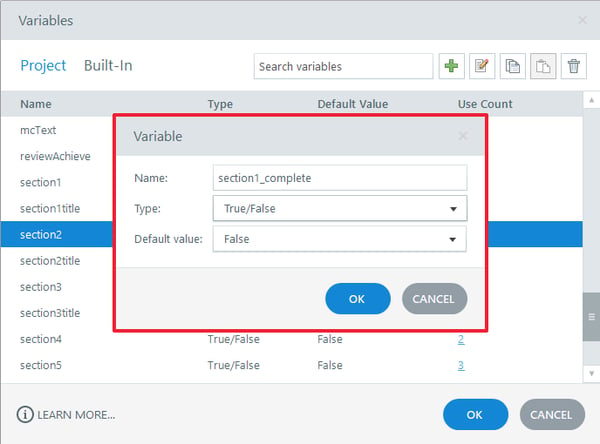
To do this, we would start by first creating a True/False variable for each section. Remember, when naming your variables, just like naming objects on your slides, you will want to stick to a naming convention that makes sense for yourself and others who might edit your work. For this example, we will name the variables “section1_complete” (and so on) and double-check that they are all set to False by default.
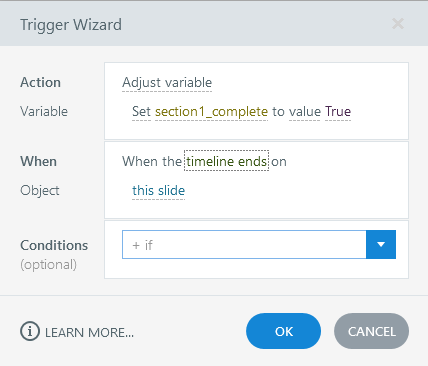
The next step is to create a trigger to set each section’s variable to True once the section is complete, usually at the end of the last slide for that section:
Show Me the Checkmark
Now it’s time to show your learner their progress! Back on the menu slide, you will create your ‘checkmark’ object – whether it’s using Storyline’s built-in checkmark shape, a custom image, or whatever else your heart desires. Set the initial state to Hidden in the States panel, as shown:
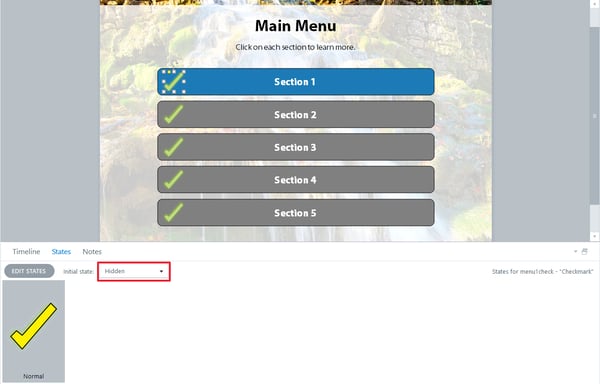
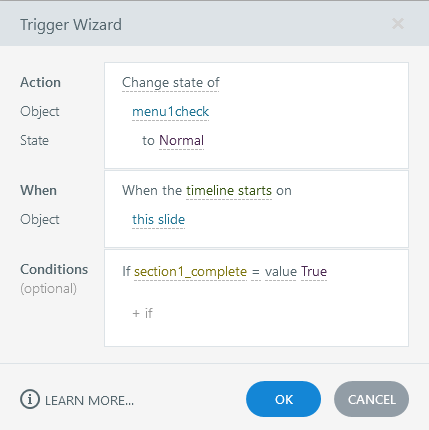
Then, create a trigger on the menu slide itself to set the checkmark’s state to Normal if the corresponding section’s True/False variable is set to True:
Repeat this process for each menu item / checkmark.
Now, when the learner returns to the menu after completing a section, the checkmark associated with it will display, letting them know that they have completed it.

Other Possibilities
You can also use your section completion triggers to lock and unlock sections as the learner progresses through your course. Start by setting the menu button for each section to an initial state of Disabled, and then use a trigger to change that state to Normal if the previous section’s completion variable is True.
That’s not the only thing you can do, either. You could add custom instructions for which section to click next or a popup directing the learner to exit once all sections are complete.
There are more possibilities, and that’s just for this set of variables related to section completion. Imagine what you can do by using True/False variables and triggers in other situations. Remember that you can also create complex triggers based off the status of multiple variables at the same time!
Next Steps
If you’re still new to variables, start with the menu example and experiment with it. Try using custom graphics instead of checkmarks or adding instructions that change with the variables. If you’re comfortable with variables, then imagine how you can use them to add more interactivity and change to other areas. Feel free to reach out to us if you get stuck, or to show us what cool ideas you create. Remember, the possibilities are endless!
Looking for more Storyline Tips & Tricks? Check out the rest of our blog series!
