
Layers in Storyline are aptly named since they do exactly as the name says – provide an extra layer of content that appears over the main slide. You can add as many or as few layers to a slide as you please, which allows for a lot of flexibility in how you display your content. You can also choose to have a layer use Triggers to show or hide other layers, which means you can have content show and hide as needed.
Top of the Stack
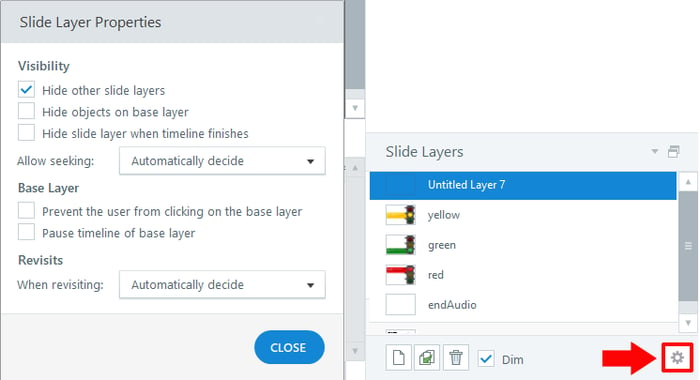
Whenever you show a layer, it will appear on top of everything, including other layers. The image below shows where you can access the Slide Layer Properties. You can see the default settings, including where the “Hide other slide layers” option is checked. You’ll want to familiarize yourself with these settings as you begin using Layers in Storyline.
In a State
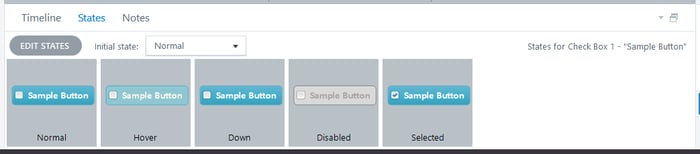
States allow for a similar level of flexibility but are object specific. Storyline has a selection of built-in States, such as Hidden, Disabled, or Selected, but you can also make your own custom states. Start with an object on the slide and create states that include a variety of poses or positions for that object.
Combining It All Together
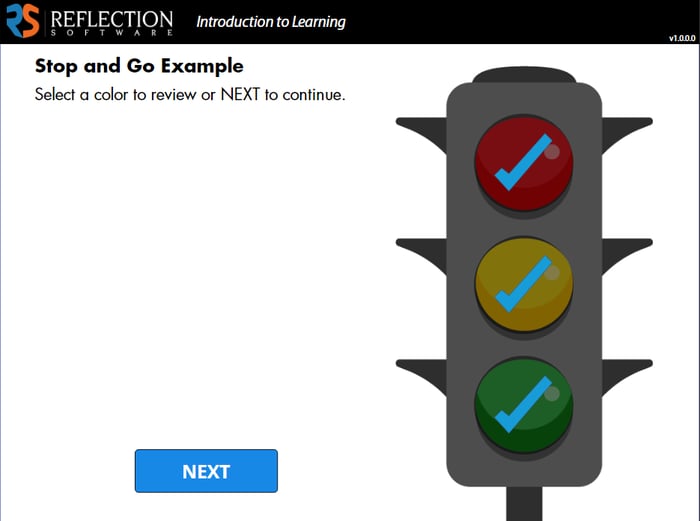
Let’s explore an example that shows how everything can fit together. Here we have a slide that uses a clickable interactive stoplight to convey information.
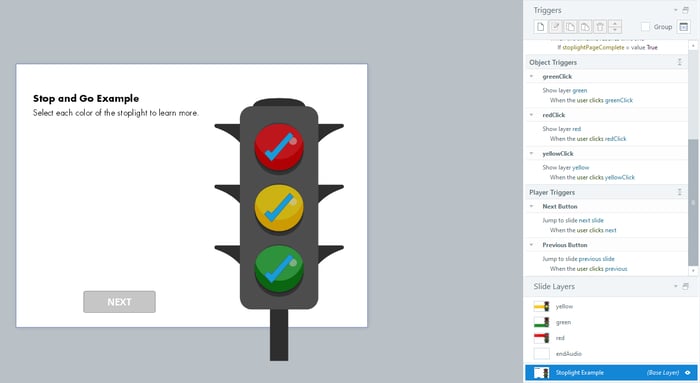
The slide has four layers: one for each of the three stoplight colors and one for the ending audio. The main slide itself has the stoplight graphic, text and some checkmarks that start out in the Hidden state. Each stoplight color has a click spot that displays its associated layer when the user clicks.
Using a combination of States, Layers, and Triggers, we have the stoplights marked as checked as the learner views each color. And when one color is active, the others are darkened. This effect is achieved by graphics on each of the individual layers. Take the red layer, for example.
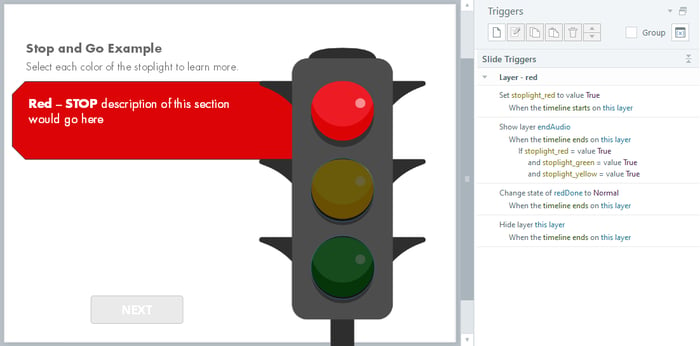
Stop, Look, and Layer
When the learner clicks the red light, the red layer becomes active, showing its information. It also changes the state of the checkmark over the red light on the main layer from Hidden to Normal, indicating that the layer has been viewed. A True/False variable[INSERT LINK] for each layer keeps track of whether that layer has been viewed, and once all three have been viewed, the final “endAudio” layer will appear with closing audio for the slide.
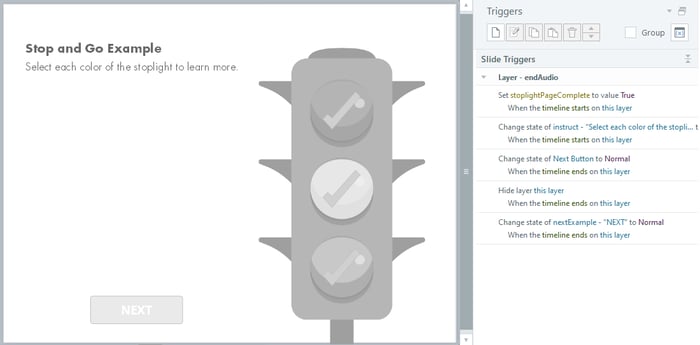
In our example, the final layer simply plays the concluding audio and marks the slide as complete. The layer doesn’t have any graphics (although it could). Once the audio is complete, it also changes the state of the instructions and a previously hidden Next button on the main layer to let the learner know it’s time to move on. Here’s what the slide looks like once all layers are complete:
Take It to the Next Level
This slide is just one example of the many ways to incorporate Layers and States into your courses. Think about other cases where you could use these tools to add interactivity and interest to a slide. Layers are great for organizing information and revealing it as needed via a click spot or at a certain time. States can provide cues to the learner that an object has changed or that a slide or section has been completed. One the best features of Storyline is the flexibility it provides in combining all its tools to create unique content. So get out there and get creative, and remember we are always here if you have questions!
